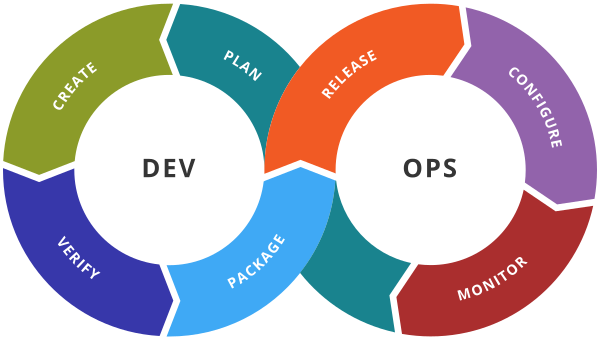
Building an application is only half of CI/CD; deploying it to several environments with the right checks is the other half. Azure DevOps offers two ways to do this: the classic Release pipelines UI (still available but no longer evolving) and multi-stage YAML pipelines with Environments, which Microsoft recommends for all new work. This tutorial builds a complete build → dev → staging → production flow for an ASP.NET Core web app on Azure App Service, with a manual approval before production and automated gates (checks) that block a broken release. The final section maps every concept back to the classic UI for teams that still use it.
Prerequisites: an Azure subscription with three App Service web apps (myapp-dev, myapp-staging, myapp-prod, Linux, .NET 8 runtime), an Azure DevOps project with an Azure Resource Manager service connection (workload identity federation recommended), and a repository containing a .NET web project. Our Azure Pipelines basics tutorial covers the service connection.
Architecture of the pipeline
- Stage Build: restore, build, test, publish an artifact (
drop). - Stage Dev: automatic deployment to
myapp-devon every commit tomain. - Stage Staging: automatic deployment, followed by a smoke test.
- Stage Production: requires an approval from the release managers, passes a business-hours check, deploys to a staging slot, then swaps slots for zero-downtime.
Step 1 – Create the Environments and the approval
An Environment is a named target (dev, staging, production) that records deployment history and carries checks. Checks are evaluated before any job that targets the environment can start; this is where approvals and gates live in YAML pipelines.
- Go to Pipelines → Environments → New environment. Create
dev,stagingandproduction(resource: None). - Open
production→ ⋮ → Approvals and checks → Approvals. Add the Release Managers group, set Minimum number of approvers to 1, tick Requester should not approve, timeout 24 hours. - Still on
production, add a Business hours check (Monday–Friday, 09:00–16:00 America/Toronto) and a Branch control check that allows onlyrefs/heads/main.
Other checks available in 2026: Invoke Azure Function and Invoke REST API (custom gates), Query Azure Monitor alerts, Required template (forces jobs to extend an approved YAML template), Evaluate artifact (policy on container images) and Exclusive lock.
Step 2 – The build stage
# azure-pipelines.yml
trigger:
  branches:
    include: [main]

variables:
  buildConfiguration: Release
  azureServiceConnection: sc-myapp          # ARM service connection name
  webAppBaseName: myapp

stages:
  - stage: Build
    displayName: Build and test
    jobs:
      - job: Build
        pool:
          vmImage: ubuntu-latest
        steps:
          - task: UseDotNet@2
            inputs:
              version: 8.x

          - script: dotnet restore
            displayName: Restore

          - script: dotnet build --configuration $(buildConfiguration) --no-restore
            displayName: Build

          - script: dotnet test --configuration $(buildConfiguration) --no-build --logger trx
            displayName: Unit tests

          - task: PublishTestResults@2
            condition: succeededOrFailed()
            inputs:
              testResultsFormat: VSTest
              testResultsFiles: '**/*.trx'

          - script: dotnet publish src/WebApp/WebApp.csproj -c $(buildConfiguration) -o $(Build.ArtifactStagingDirectory)/app
            displayName: Publish

          - task: ArchiveFiles@2
            inputs:
              rootFolderOrFile: $(Build.ArtifactStagingDirectory)/app
              includeRootFolder: false
              archiveFile: $(Build.ArtifactStagingDirectory)/app.zip

          - publish: $(Build.ArtifactStagingDirectory)/app.zip
            artifact: drop
Step 3 – A reusable deployment template
Dev, staging and production run the same steps with different parameters, so put them in a template. deployment jobs (as opposed to plain jobs) are what bind a job to an Environment and trigger its checks.
# templates/deploy-webapp.yml
parameters:
  - name: environmentName     # dev | staging | production
    type: string
  - name: webAppName
    type: string
  - name: slotName
    type: string
    default: production        # App Service default slot
  - name: healthUrl
    type: string

jobs:
  - deployment: Deploy
    displayName: Deploy to ${{ parameters.environmentName }}
    environment: ${{ parameters.environmentName }}
    pool:
      vmImage: ubuntu-latest
    strategy:
      runOnce:
        deploy:
          steps:
            - download: current
              artifact: drop

            - task: AzureWebApp@1
              inputs:
                azureSubscription: $(azureServiceConnection)
                appType: webAppLinux
                appName: ${{ parameters.webAppName }}
                ${{ if ne(parameters.slotName, 'production') }}:
                  deployToSlotOrASE: true
                  resourceGroupName: rg-myapp
                  slotName: ${{ parameters.slotName }}
                package: $(Pipeline.Workspace)/drop/app.zip

            - script: |
                for i in $(seq 1 10); do
                  code=$(curl -s -o /dev/null -w '%{http_code}' "${{ parameters.healthUrl }}")
                  [ "$code" = "200" ] && echo "healthy" && exit 0
                  echo "attempt $i: HTTP $code"; sleep 10
                done
                exit 1
              displayName: Smoke test
Step 4 – Wire the stages together
  - stage: Dev
    dependsOn: Build
    jobs:
      - template: templates/deploy-webapp.yml
        parameters:
          environmentName: dev
          webAppName: $(webAppBaseName)-dev
          healthUrl: https://$(webAppBaseName)-dev.azurewebsites.net/healthz

  - stage: Staging
    dependsOn: Dev
    jobs:
      - template: templates/deploy-webapp.yml
        parameters:
          environmentName: staging
          webAppName: $(webAppBaseName)-staging
          healthUrl: https://$(webAppBaseName)-staging.azurewebsites.net/healthz

  - stage: Production
    dependsOn: Staging
    condition: and(succeeded(), eq(variables['Build.SourceBranch'], 'refs/heads/main'))
    jobs:
      # 1) Deploy to the "blue" slot of the production app; approval + checks fire here
      - template: templates/deploy-webapp.yml
        parameters:
          environmentName: production
          webAppName: $(webAppBaseName)-prod
          slotName: blue
          healthUrl: https://$(webAppBaseName)-prod-blue.azurewebsites.net/healthz

      # 2) Swap slots: instant cut-over, instant rollback by swapping back
      - job: Swap
        dependsOn: Deploy
        pool:
          vmImage: ubuntu-latest
        steps:
          - task: AzureAppServiceManage@0
            inputs:
              azureSubscription: $(azureServiceConnection)
              Action: Swap Slots
              WebAppName: $(webAppBaseName)-prod
              ResourceGroupName: rg-myapp
              SourceSlot: blue
              SwapWithProduction: true
Commit and run. The Build, Dev and Staging stages run automatically. When the run reaches Production it pauses with the status “Waiting for approval”; approvers receive an e-mail and can approve or reject from the run summary (with a comment). Only after approval and a green business-hours check does the deployment job start.
Step 5 – Add an automated gate with Azure Monitor
Approvals catch human judgement; gates catch data. On the production environment add the check Query Azure Monitor alerts, pointing at the resource group of the staging app and filtering on severity Sev0–Sev2. If any alert is firing (5xx rate, response time) when the run reaches Production, the check fails and re-evaluates every 5 minutes until the timeout. A REST-API check can call your own quality gate (SonarQube, a synthetic test service) in the same way; the endpoint must return a JSON body and the check succeeds when the Success criteria expression such as eq(root['status'], 'green') is true.
Rollback
Because production traffic was moved by a slot swap, rolling back is another swap: run az webapp deployment slot swap -g rg-myapp -n myapp-prod --slot blue or re-run only the Swap job from the pipeline. Alternatively, re-deploy a previous run: open it in Azure DevOps, choose Rerun failed jobs / Run stage on Production; the artifact of that run is redeployed, again subject to approval.
Mapping to classic Release pipelines
| Classic Release UI | YAML equivalent |
|---|---|
| Release pipeline with artifact from a build | Multi-stage pipeline; the artifact is publish/download |
| Stage (Dev, QA, Prod) | stage with a deployment job |
| Pre-deployment approvals | Approvals check on the Environment |
| Pre-deployment gates (Azure Monitor, REST, Azure Function) | Checks of the same names on the Environment |
| Deployment groups | Environment with VM resources (environment: prod.vm-name) |
| Release variables per stage | Variable groups linked per stage, or variables: at stage level |
| Post-deployment approvals | Add a manual validation task (ManualValidation@0) in an agentless job |
If you still maintain classic releases, the UI path is Pipelines → Releases → Edit → click the person icon before a stage → Pre-deployment conditions: enable Pre-deployment approvals and Gates, then add the gate type and set the sampling interval (default 5 min) and timeout. Microsoft has announced no removal date, but new features (templates, checks, YAML validation) only land on the YAML side.
Troubleshooting
- Stage skipped with “Not deployed: condition not met” – the
conditionuses the branch; pull request builds run fromrefs/pull/…. - Approval never shows up – the job is a plain
job, not adeployment, or it targets an environment without checks. - “No hosted parallelism has been purchased or granted” – new organizations must request the free grant or use a self-hosted agent.
- Slot swap fails with warm-up timeout – set
WEBSITE_SWAP_WARMUP_PING_PATH=/healthzandWEBSITE_SWAP_WARMUP_PING_STATUSES=200on the app.
Key takeaways
- Environments +
deploymentjobs are the YAML home for approvals and gates. - Templates keep dev/staging/prod identical; only parameters differ.
- Deploy to a slot and swap for zero-downtime releases and one-command rollback.
- Combine human approvals with data-driven checks (Azure Monitor, REST) for real safety.
Next tutorial
Next: Azure ARM templates and Bicep to create the App Service resources from the same pipeline. Official docs: Environments, Approvals and checks, Gates (classic).
Retour parcours Azure DevOps — hub de la série et leçons sœurs.