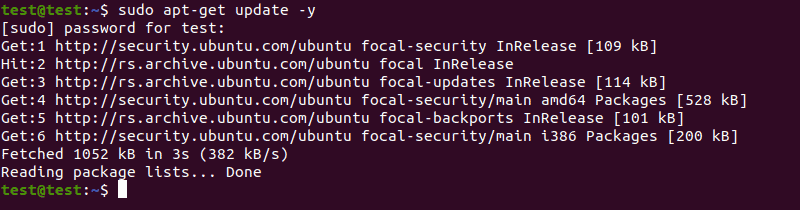
Step 1: Update Package List
Before you start the installation process, update the list of available packages:
sudo apt-get update -y
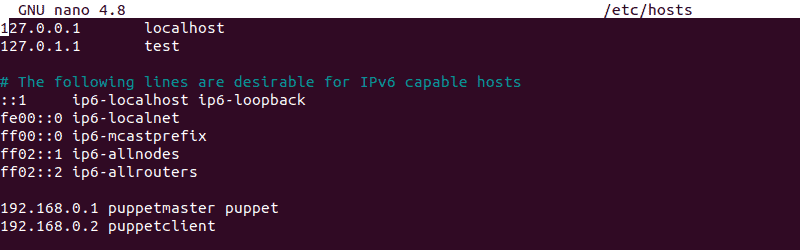
Step 2: Set Up Hostname Resolution
With Puppet, master and client nodes communicate using hostnames. Before installing Puppet, you need to set up a unique hostname on each node.
1. Open the hosts file on each node by using:
sudo nano /etc/hosts
2. Paste the following lines at the end of each hosts file:
[puppet master ip] puppetmaster puppet
[puppet client ip] puppetclient
Where:
[puppet master ip]is the IP address of the master node, and[puppet client ip]is the IP address of the client node.
3. Press Ctrl + X to close the file, and then type Y and press Enter to save the changes you made.
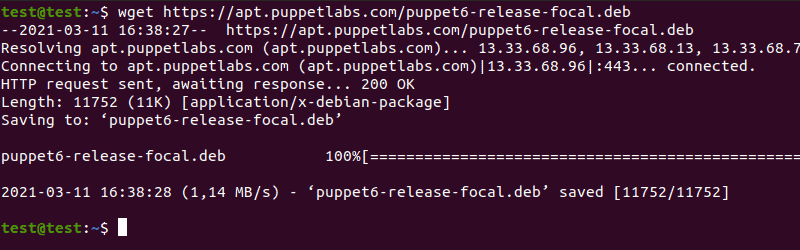
Step 3: Install Puppet Server on Master Node
1. Download the latest Puppet version on the master node:
wget https://apt.puppetlabs.com/puppet6-release-focal.deb
2. Once the download is complete, install the package by using:
sudo dpkg -i puppet6-release-focal.deb

3. Update the package repository:
sudo apt-get update -y
4. Install the Puppet server with the following command:
sudo apt-get install puppetserver -y
5. Open the puppetserver file by using:
sudo nano /etc/default/puppetserver
6. In the puppetserver file, modify the following line to change the memory size to 1GB:
JAVA_ARGS="-Xms1g -Xmx1g -Djruby.logger.class=com.puppetlabs.jruby_utils.jruby.Slf4jLogger"
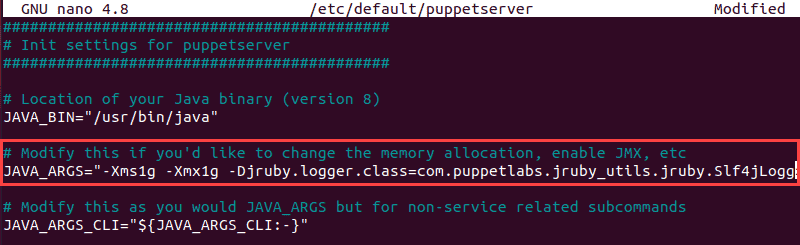
7. Press Ctrl + X to close the puppetserver file. Type Y and press Enter to save the changes you made.
8. Start the Puppet service and set it to launch on system boot by using:
sudo systemctl start puppetserver
sudo systemctl enable puppetserver

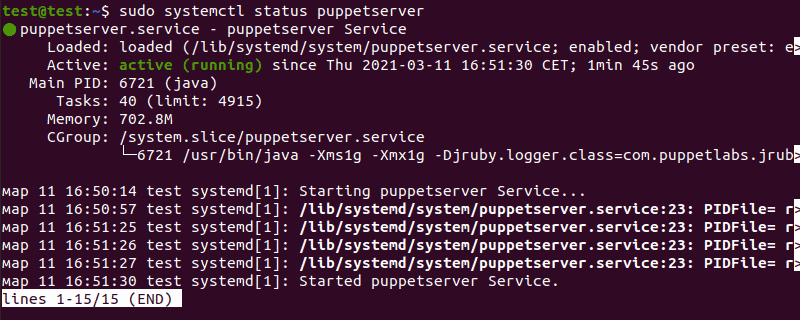
9. Check if the Puppet service is running with:
sudo systemctl status puppetserver
Step 4: Install Puppet Agent on Client Node
1. Download the latest version of Puppet on a client node:
wget https://apt.puppetlabs.com/puppet6-release-focal.deb
2. Once the download is complete, install the package by using:
sudo dpkg -i puppet6-release-focal.deb
3. Update the package repository one more time:
sudo apt-get update -y
4. Install the Puppet agent by using:
sudo apt-get install puppet-agent -y
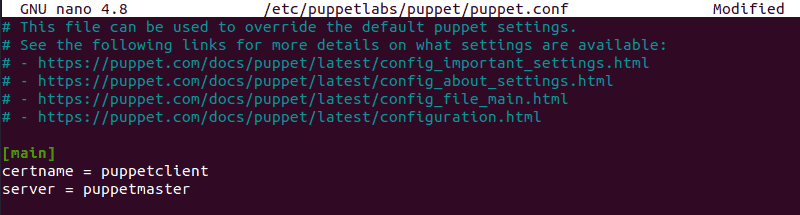
5. Open the Puppet configuration file:
sudo nano /etc/puppetlabs/puppet/puppet.conf
6. Add the following lines to the end of the Puppet configuration file to define the Puppet master information:
[main]
certname = puppetclient
server = puppetmaster
7. Press Ctrl + X to close the Puppet configuration file, then type Y and press Enter to save the changes.
8. Start the Puppet service and set it to launch on system boot by using:
sudo systemctl start puppet
sudo systemctl enable puppet
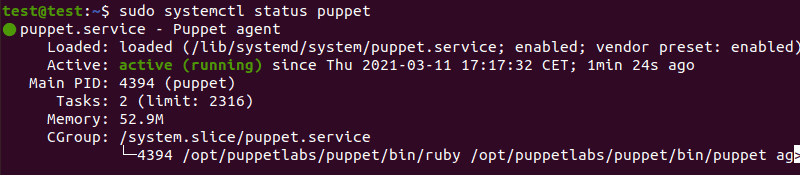
9. Check if the Puppet service is running with:
sudo systemctl status puppet
Step 5: Sign Puppet Agent Certificate
1. Using the Puppet master node, list all the available certificates:
sudo /opt/puppetlabs/bin/puppetserver ca list --all

2. Sign the certificates with:
sudo /opt/puppetlabs/bin/puppetserver ca sign --all
3. Use the following command to test the communication between the master and client nodes:
sudo /opt/puppetlabs/bin/puppet agent --testBelow is the puppet manifest directory/etc/puppetlabs/code/environments/production/manifests/site.pp
Step 1: Update Package List
Before you start the installation process, update the list of available packages:
sudo apt-get update -y
Step 2: Set Up Hostname Resolution
With Puppet, master and client nodes communicate using hostnames. Before installing Puppet, you need to set up a unique hostname on each node.
1. Open the hosts file on each node by using:
sudo nano /etc/hosts
2. Paste the following lines at the end of each hosts file:
[puppet master ip] puppetmaster puppet
[puppet client ip] puppetclient
Where:
[puppet master ip]is the IP address of the master node, and[puppet client ip]is the IP address of the client node.
3. Press Ctrl + X to close the file, and then type Y and press Enter to save the changes you made.
Step 3: Install Puppet Server on Master Node
1. Download the latest Puppet version on the master node:
wget https://apt.puppetlabs.com/puppet6-release-focal.deb
2. Once the download is complete, install the package by using:
sudo dpkg -i puppet6-release-focal.deb
3. Update the package repository:
sudo apt-get update -y
4. Install the Puppet server with the following command:
sudo apt-get install puppetserver -y
5. Open the puppetserver file by using:
sudo nano /etc/default/puppetserver
6. In the puppetserver file, modify the following line to change the memory size to 1GB:
JAVA_ARGS="-Xms1g -Xmx1g -Djruby.logger.class=com.puppetlabs.jruby_utils.jruby.Slf4jLogger"
7. Press Ctrl + X to close the puppetserver file. Type Y and press Enter to save the changes you made.
8. Start the Puppet service and set it to launch on system boot by using:
sudo systemctl start puppetserver
sudo systemctl enable puppetserver
9. Check if the Puppet service is running with:
sudo systemctl status puppetserver
Step 4: Install Puppet Agent on Client Node
1. Download the latest version of Puppet on a client node:
wget https://apt.puppetlabs.com/puppet6-release-focal.deb
2. Once the download is complete, install the package by using:
sudo dpkg -i puppet6-release-focal.deb
3. Update the package repository one more time:
sudo apt-get update -y
4. Install the Puppet agent by using:
sudo apt-get install puppet-agent -y
5. Open the Puppet configuration file:
sudo nano /etc/puppetlabs/puppet/puppet.conf
6. Add the following lines to the end of the Puppet configuration file to define the Puppet master information:
[main]
certname = puppetclient
server = puppetmaster
7. Press Ctrl + X to close the Puppet configuration file, then type Y and press Enter to save the changes.
8. Start the Puppet service and set it to launch on system boot by using:
sudo systemctl start puppet
sudo systemctl enable puppet
9. Check if the Puppet service is running with:
sudo systemctl status puppet
Step 5: Sign Puppet Agent Certificate
1. Using the Puppet master node, list all the available certificates:
sudo /opt/puppetlabs/bin/puppetserver ca list --all
2. Sign the certificates with:
sudo /opt/puppetlabs/bin/puppetserver ca sign --all
3. Use the following command to test the communication between the master and client nodes:
sudo /opt/puppetlabs/bin/puppet agent --testBelow is the puppet manifest directory/etc/puppetlabs/code/environments/production/manifests/site.pp
